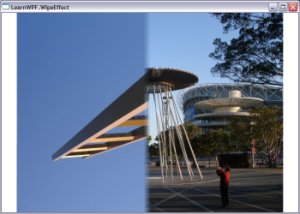
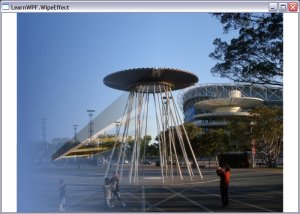
In film editing a “wipe” is a technique for transitioning from one scene to another. We can create a similar effect in WPF by overlapping two items (for instance by placing them both in a single-cell grid) and specifying a LinearGradientBrush as the OpacityMask on the top-most item. Then by animating the Offset property of the GradientStops of the brush we can create the wipe effect. By modifying the start time of the second DoubleAnimation you can modify the width of the “in-between” area. An earlier start-time will give a narrower region that shows pieces of both items.
Xaml Code (RC1)
<Window x:Class=“LearnWPF.WipeEffect.Window1”
xmlns=”http://schemas.microsoft.com/winfx/2006/xaml/presentation“
xmlns:x=”http://schemas.microsoft.com/winfx/2006/xaml“
Title=“LearnWPF.WipeEffect” Height=“500” Width=“700” Name=“mainWindow”
>
<Grid>
<Image Source=“Images/UFO.jpg” />
<Image Source=“Images/ladder.jpg”>
<Image.OpacityMask>
<LinearGradientBrush StartPoint=“0,0” EndPoint=“1,0”>
<GradientStop Offset=“0” Color=“Black” x:Name=“BlackStop”/>
<GradientStop Offset=“0” Color=“Transparent” x:Name=“TransparentStop”/>
</LinearGradientBrush>
</Image.OpacityMask>
</Image>
</Grid>
<Window.Triggers>
<EventTrigger RoutedEvent=“Window.Loaded”>
<EventTrigger.Actions>
<BeginStoryboard>
<Storyboard>
<DoubleAnimation Storyboard.TargetName=“TransparentStop”
Storyboard.TargetProperty=“Offset” By=“1” Duration=“0:0:2” />
<DoubleAnimation Storyboard.TargetName=“BlackStop”
Storyboard.TargetProperty=“Offset” By=“1” Duration=“0:0:2”
BeginTime=“0:0:0.05” />
</Storyboard>
</BeginStoryboard>
</EventTrigger.Actions>
</EventTrigger>
</Window.Triggers>
</Window>
| A BeginTime of 50ms for the second animation produces a “tighter” wipe | A BeginTime of 1 second for the second animation produces a more gradual transition |

|

|